Receive a delivery
Check a delivery against its purchase order and record what arrived. Only the quantity you accept becomes stock; anything rejected, damaged or missing is recorded as a discrepancy instead.
Before you start
- You need to be a Dedicated IT Warehouse Administrator or CDI Staff, an Asset and Logistics Associate, an IT Hardware Inventory Supervisor or the IT Business Systems or Application Team.
- The purchase order must be placed (status Ordered or Partially Received). A draft order cannot be received against.
- Have the delivery note and supplier invoice to hand, and know which slot the accepted goods went into.
Steps
Open the purchase order
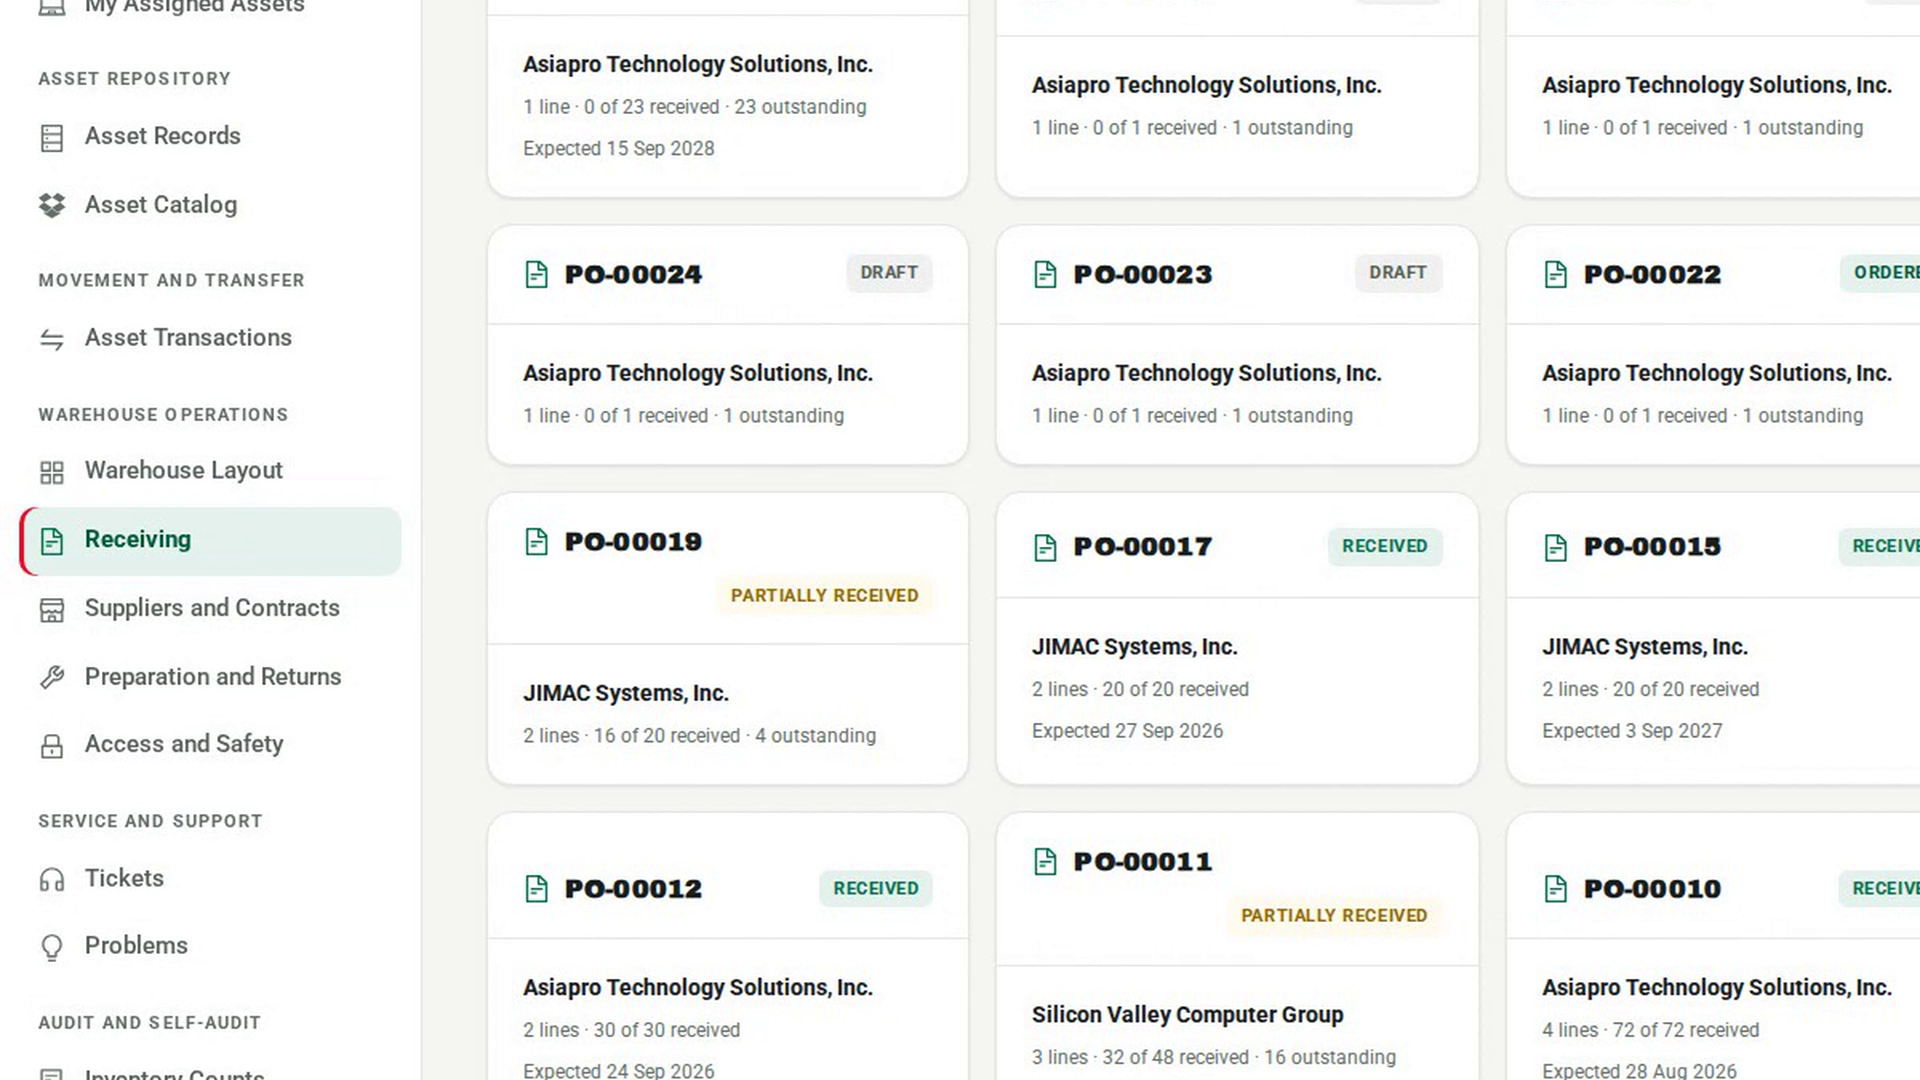
In the sidebar, under Warehouse Operations, select Receiving, then select the order's card. The order opens with its Lines, showing how much of each line has been received so far.
Start the inspection
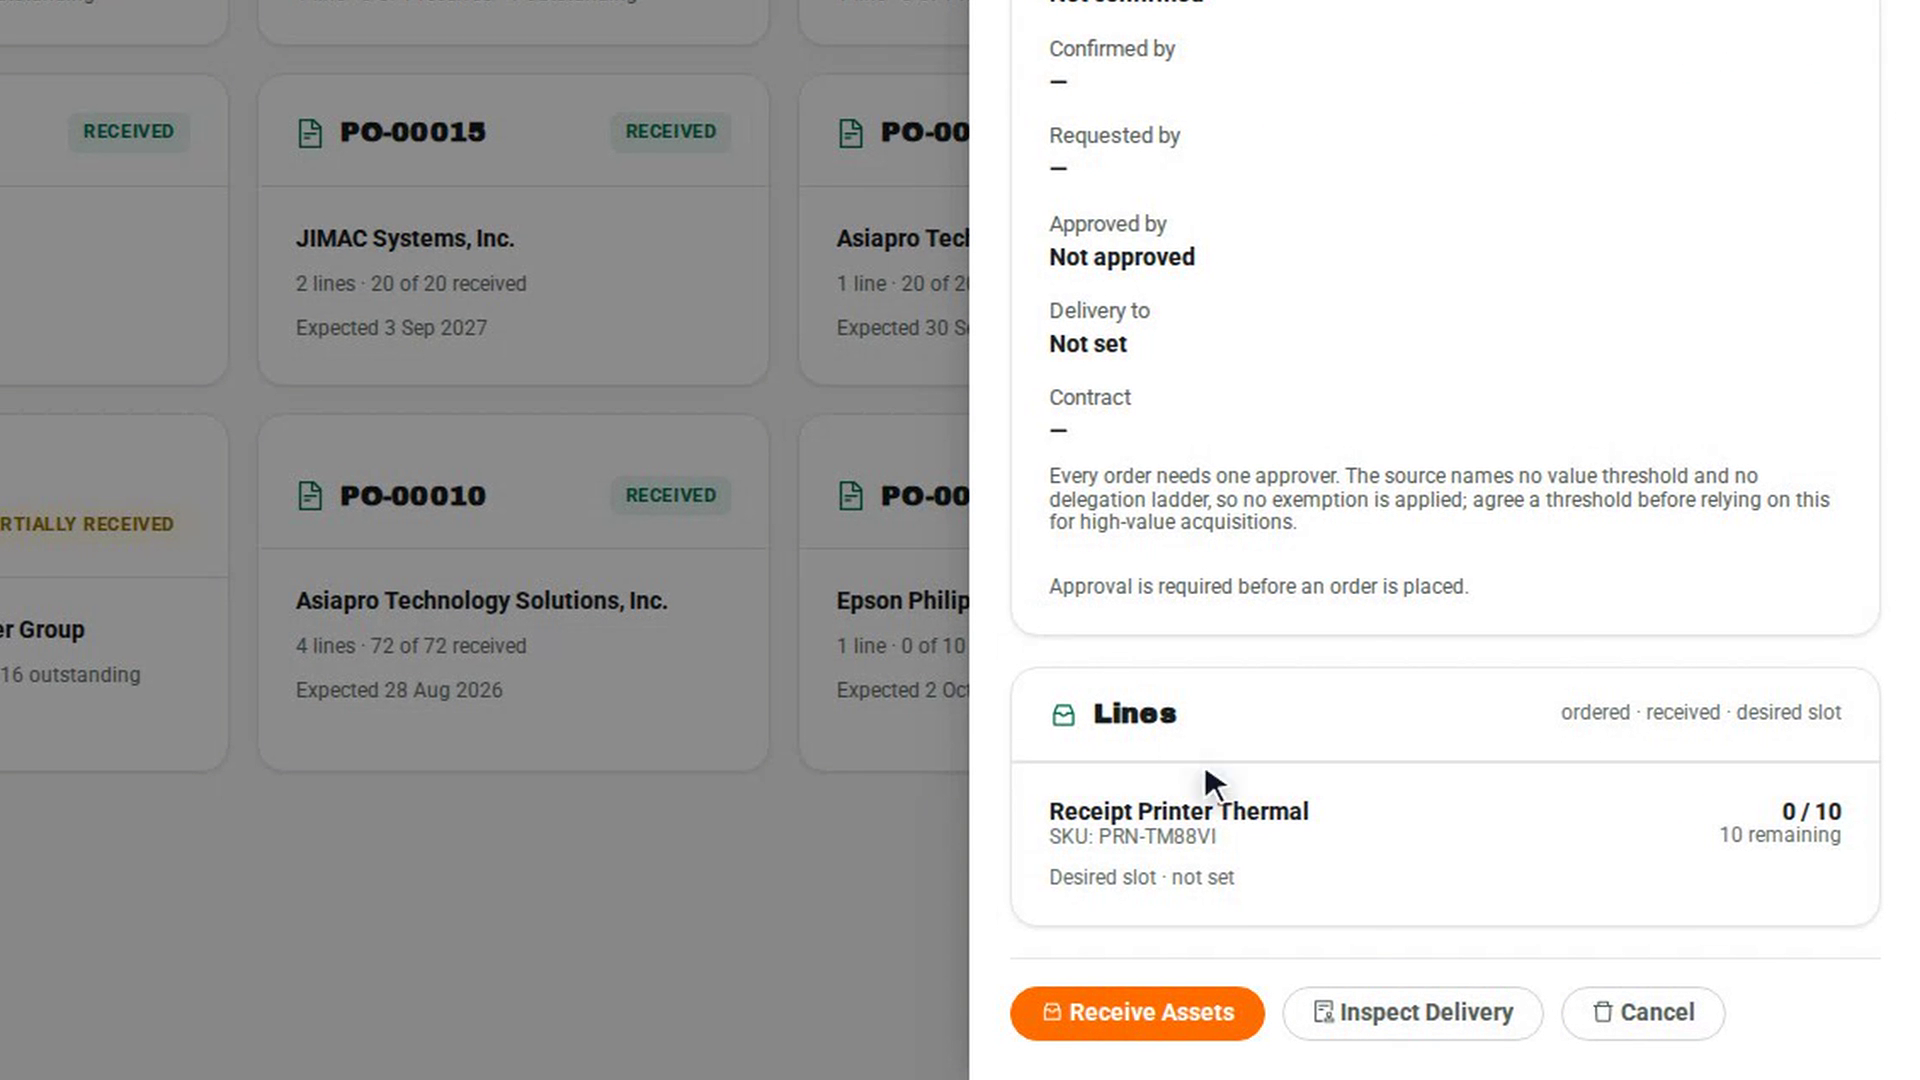
Select Inspect Delivery. The Inspect delivery against dialog lists every line that is still outstanding, with its SKU, manufacturer and model so you can check them against what arrived.
Record the delivery details
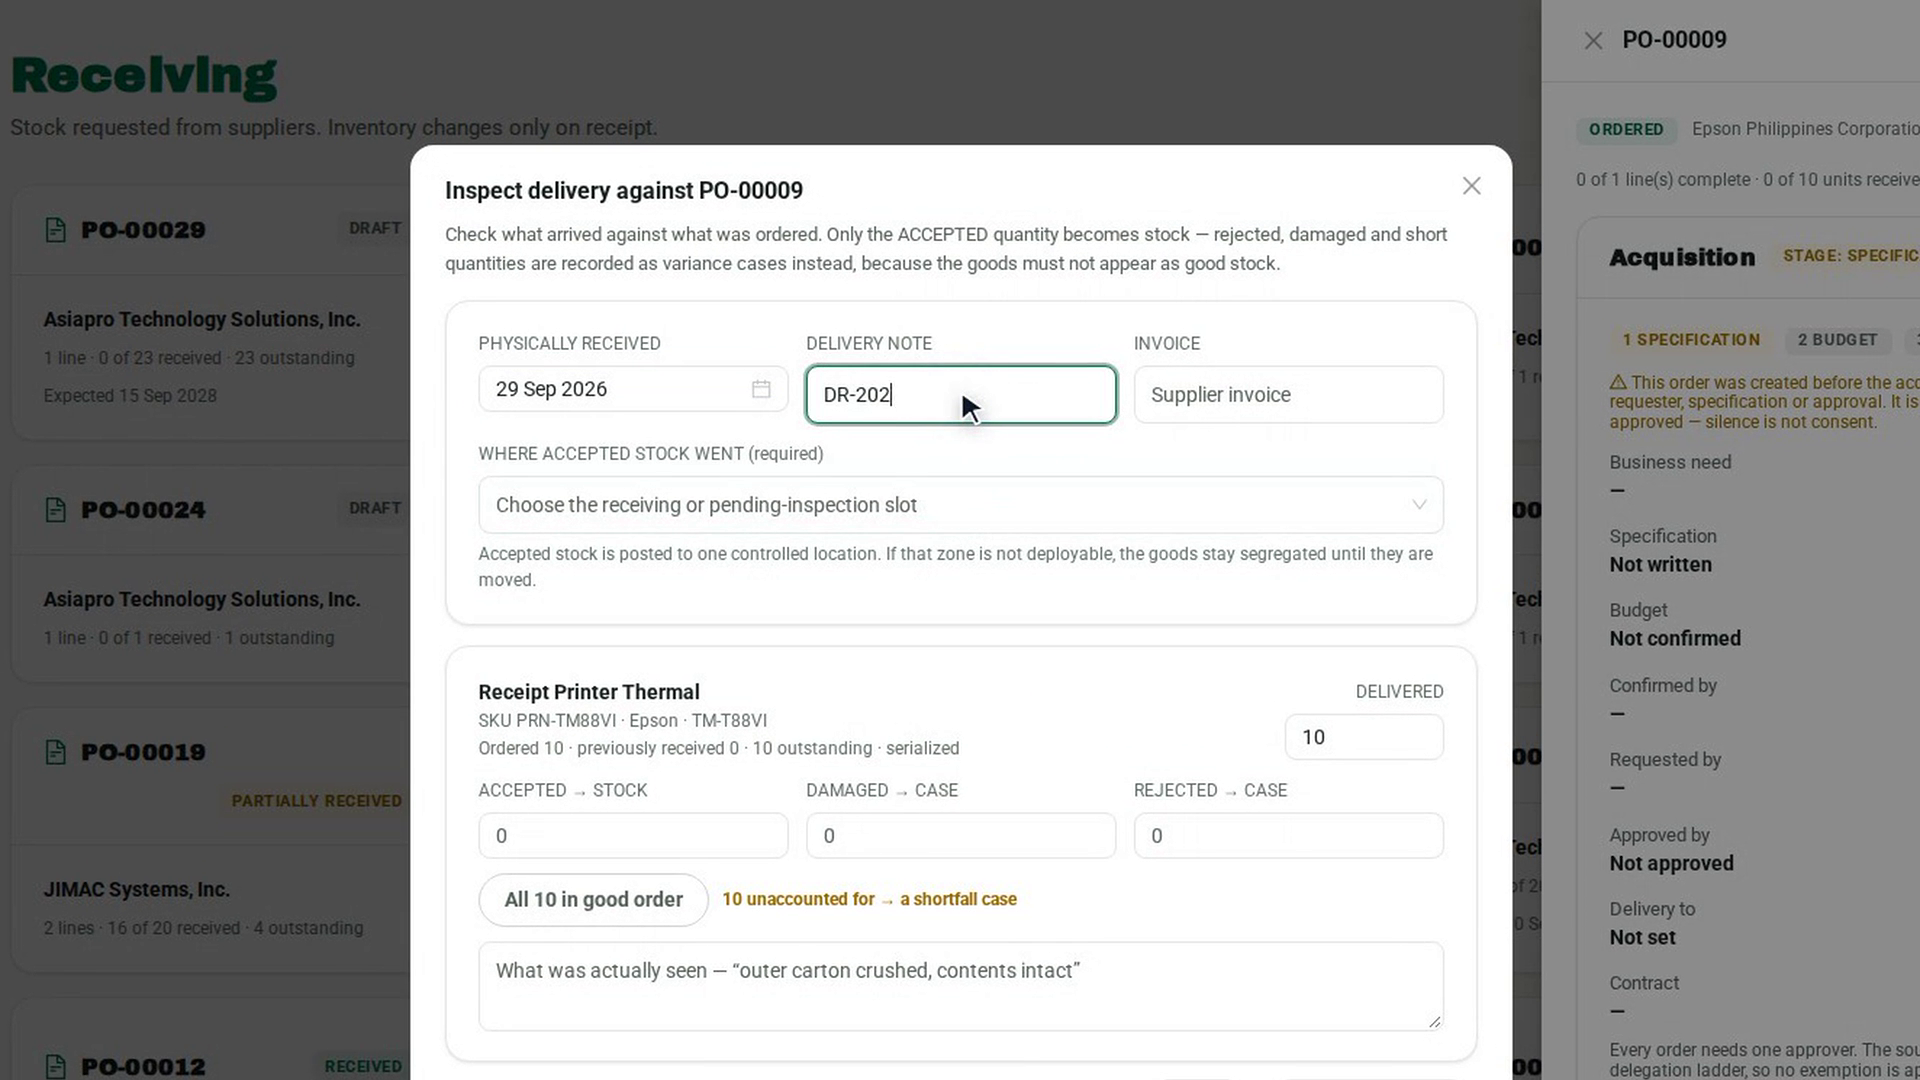
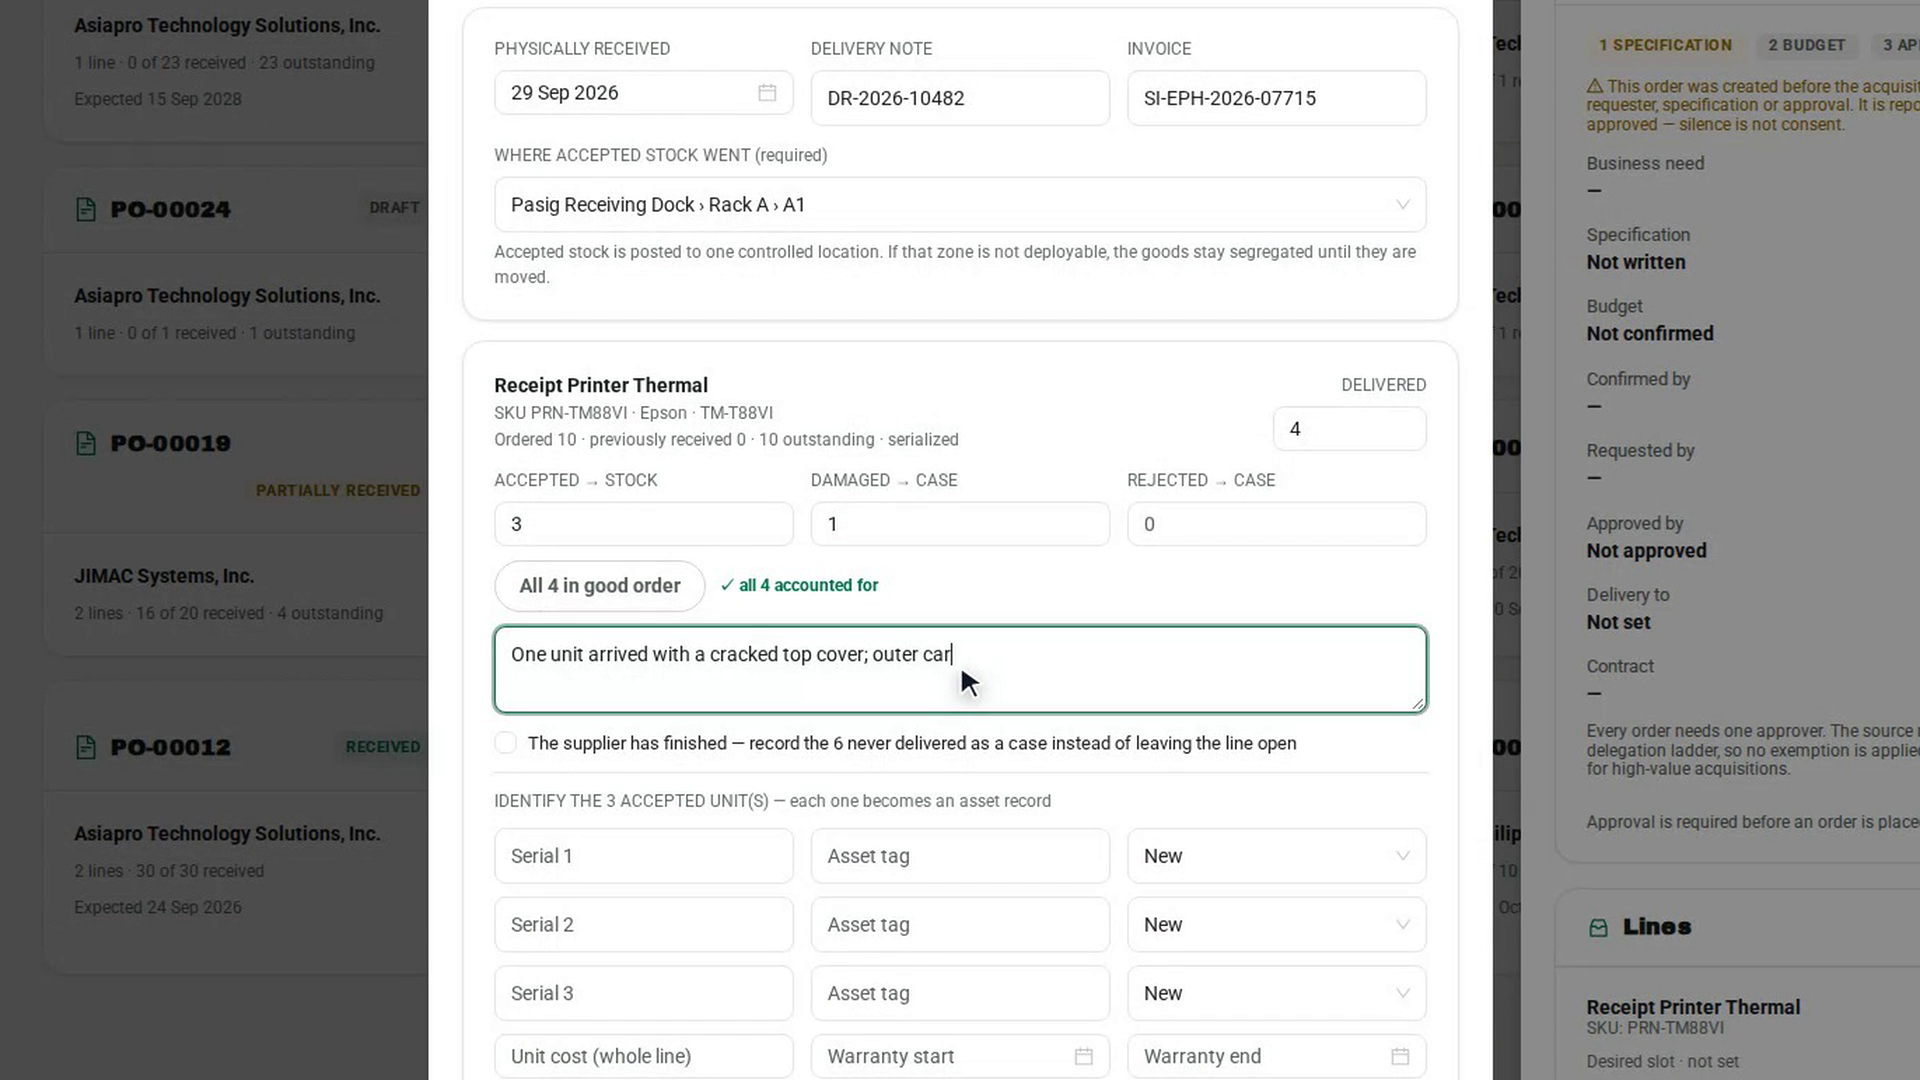
Set the PHYSICALLY RECEIVED date, and enter the DELIVERY NOTE number and the INVOICE reference from the paperwork. Under WHERE ACCEPTED STOCK WENT (required), choose the slot the accepted goods were put into.
Split each line into accepted, damaged and rejected
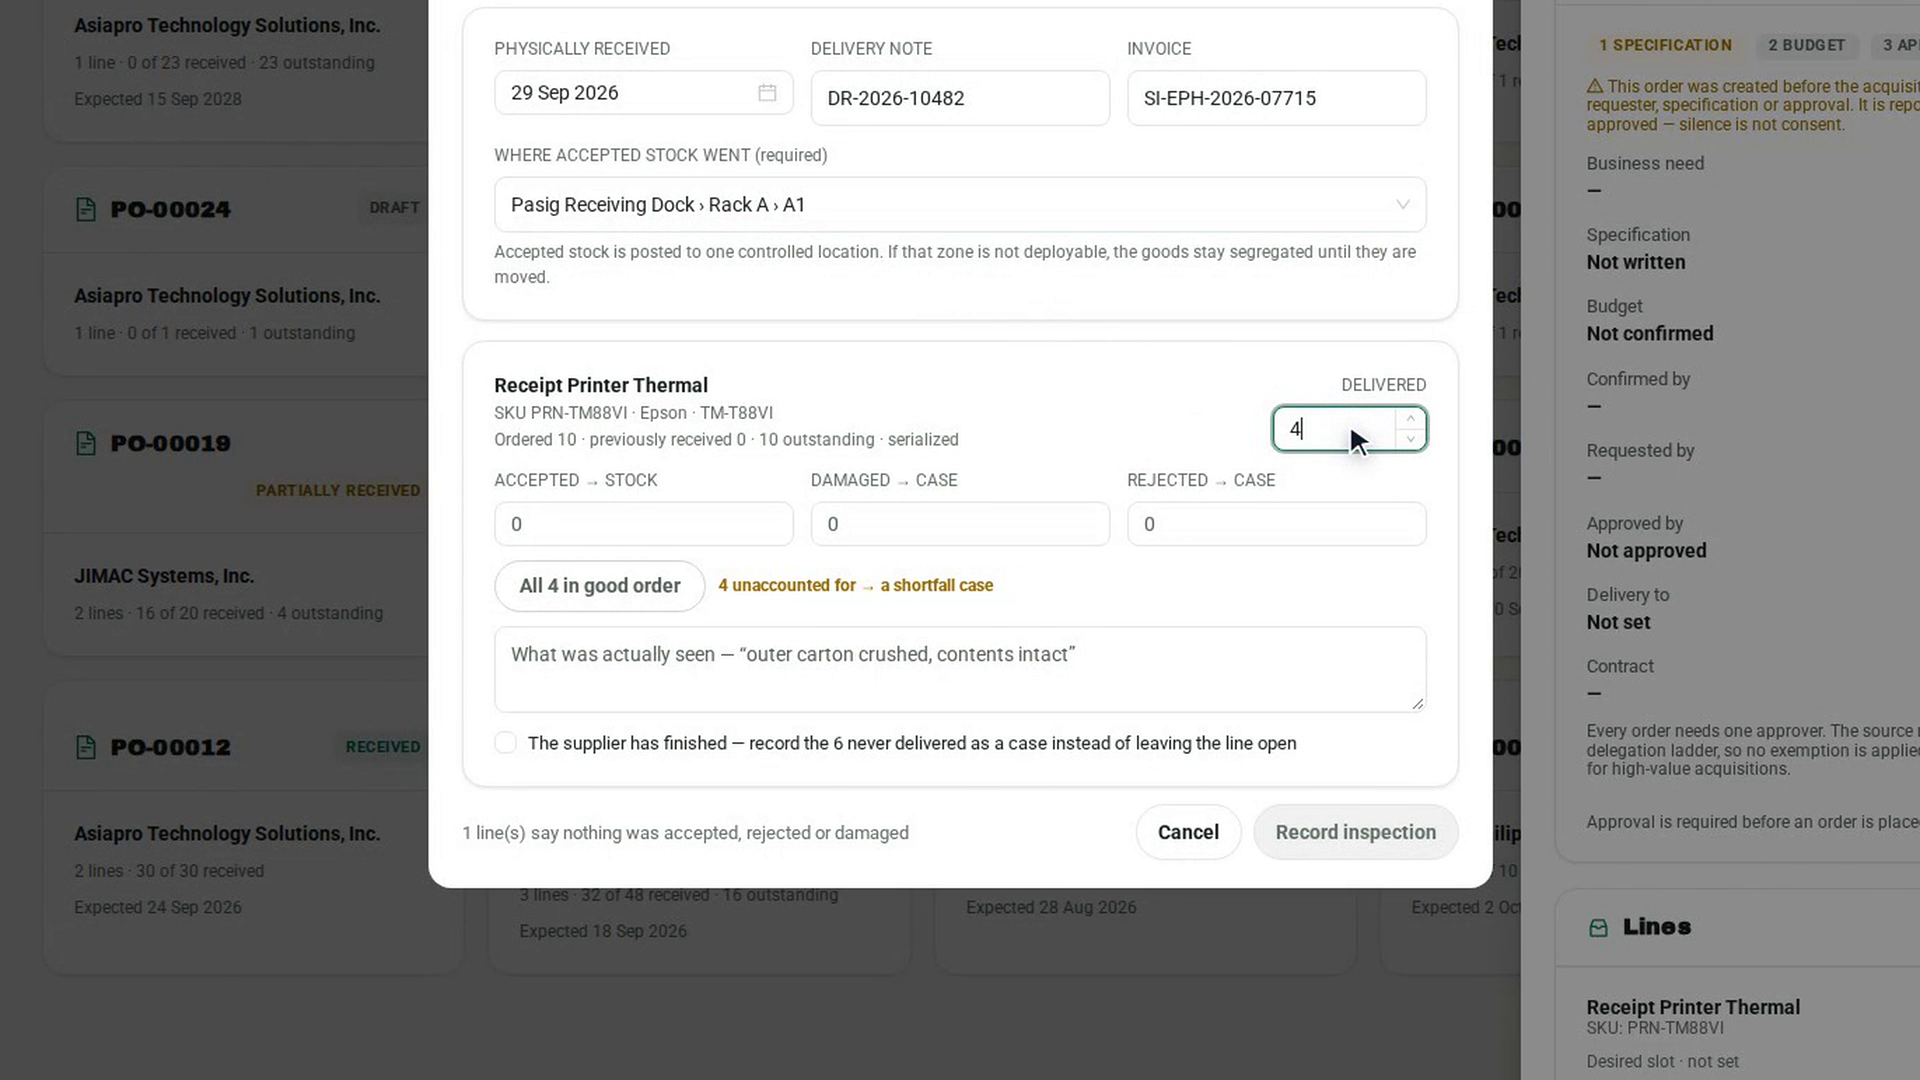
For each line, check DELIVERED (it starts at the quantity still expected — change it if a different amount arrived). Then enter how many are ACCEPTED → STOCK, DAMAGED → CASE and REJECTED → CASE. These start empty: count and type them yourself. If everything on a line is fine, select All … in good order. The line tells you whether everything is accounted for, or how many will become a shortfall case.
Describe what you saw
Add a remark on any line that needs one, for example a crushed carton. If fewer arrived than expected and the supplier will not send the rest, tick The supplier has finished so the undelivered quantity is recorded as a case instead of staying open.
Identify serialized units
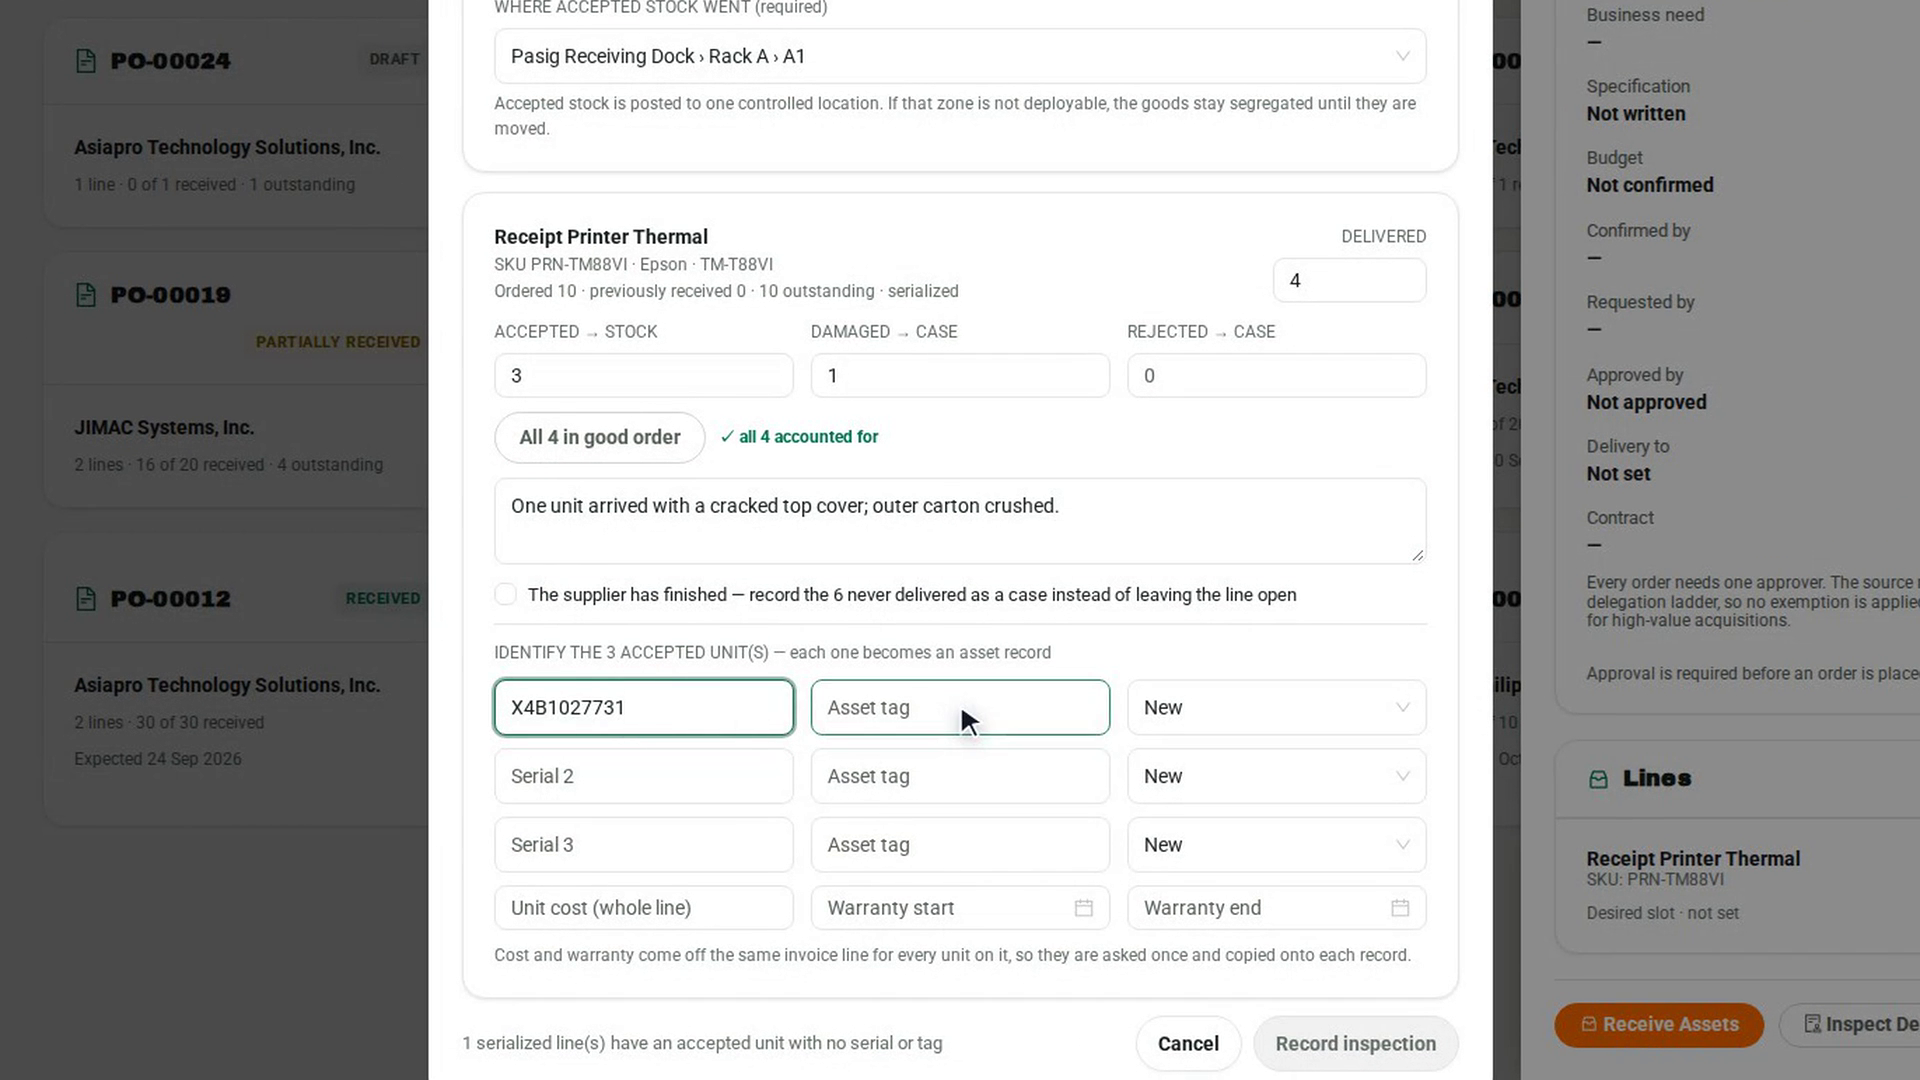
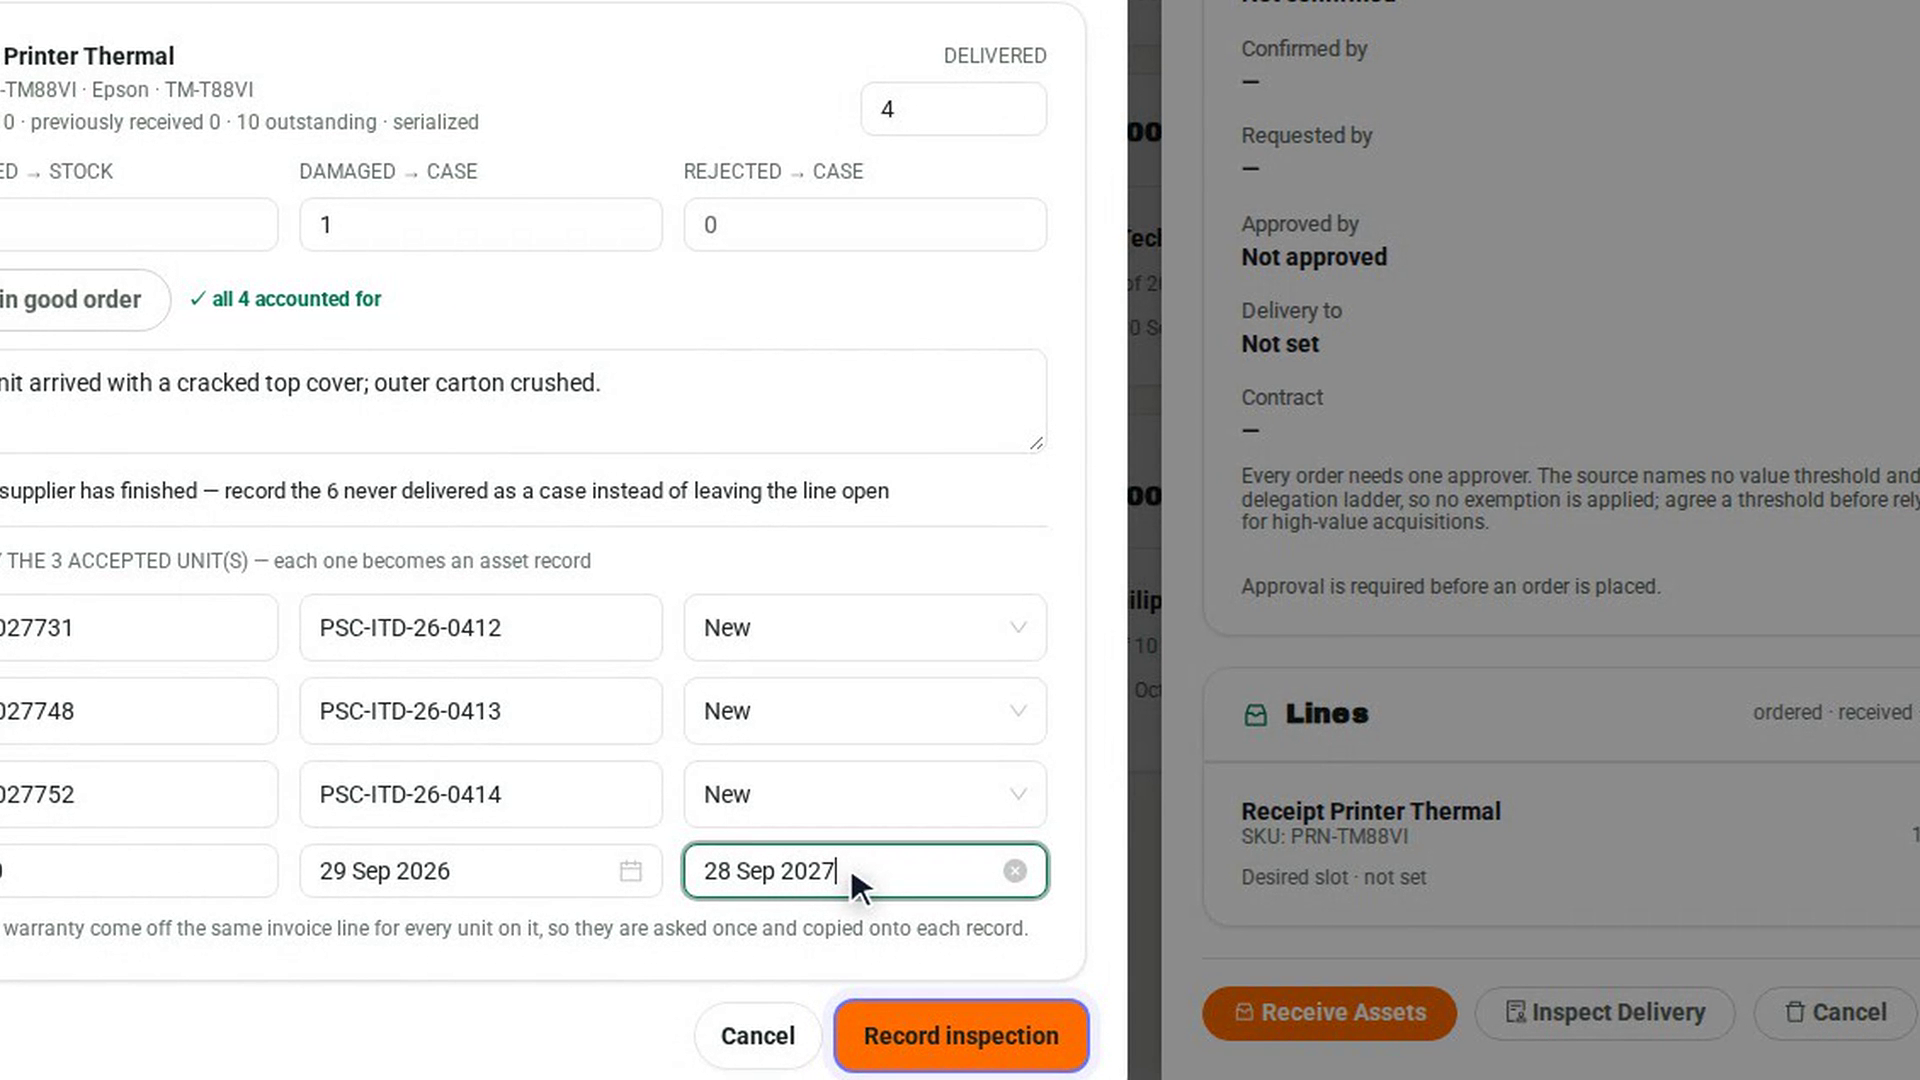
For a serialized line, enter a serial number or asset tag for each accepted unit, and its condition. Enter the Unit cost (whole line), Warranty start and Warranty end once; they are copied onto every unit. Each unit becomes an asset record.
Record the inspection
Select Record inspection. The dialog shows how many lines were accepted, how many Assets registered and how many Cases opened, and whether the order is fully received or keeps its remainder open. Select Done.
Screenshots
Step 1: Open the purchase order
Step 2: Start the inspection
Step 3: Record the delivery details
Step 4: Split each line into accepted, damaged and rejected
Step 5: Describe what you saw
Step 6: Identify serialized units
Step 7: Record the inspection
Watch how
Tip: If Record inspection is greyed out, the reason is shown next to it — for example a line where nothing was accepted, rejected or damaged, a split that adds up to more than was delivered, or an accepted serialized unit with no serial or tag.
Rejected and damaged goods never become stock, and a quantity you leave unaccounted for becomes a shortfall case. Recording an exception here corrects nothing; it is investigated and resolved under Discrepancies.